
3D interior visualization is a tool that helps you envision the future design in advance, test combinations of materials, lighting, and furniture, and avoid costly mistakes during the renovation phase.
A high-quality render makes the project understandable not only to the designer but also to the client, builders, and suppliers.
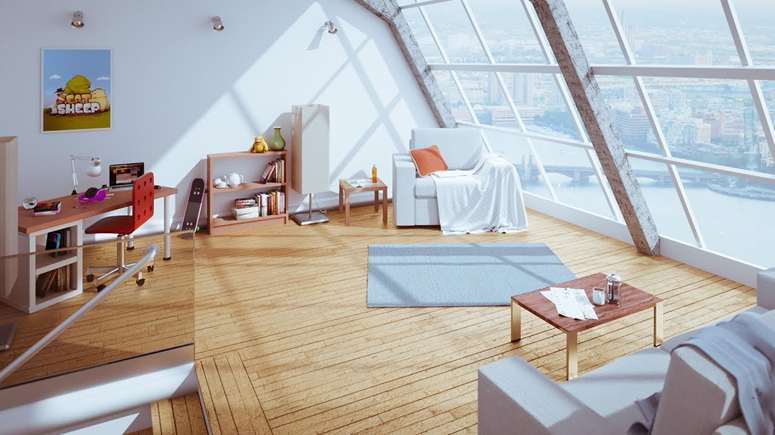
To ensure exterior and interior rendering case study looks believable, it’s not just beautiful models and «expensive» textures that are important, but also the logic of the space: realistic dimensions, correct light sources, appropriate accents, and a consistent style. Below are rules and practical tips that improve the quality of visualization and speed up project approval.
Presentation Tips: How to Make a Render Clear and Selling
A successful shot is not only beautiful but also informative: it shows the layout, passageways, elevations, functional areas, and key design decisions. Don’t overload the scene with decor: it should support the concept, not contradict it.
- Shoot key points: the entrance, the general view, the key area (kitchen/living room/bedroom), and the main areas (bathroom, workspace).
- Keep verticals straight to prevent the room from appearing «falling.»
- Use a clear perspective: too wide an angle distorts proportions.
Technical Quality: Noise, Sharpness, and Color
A clean render is a sign of professionalism. Noise, blur, incorrect white balance, and excessive post-processing reduce the project’s credibility and complicate approvals.
Bottom line: high-quality 3D interior visualization is built on precise geometry, proper lighting, and believable materials, while a compelling presentation relies on clear angles and accurate technical quality. By following these rules, you’ll get a render that’s not just «pretty,» but also helps you make decisions and confidently move the project toward completion.
Preparing the specifications: footage, style, references, shot composition
It’s convenient to prepare the specifications as a single document (PDF/table) and supplement it with a folder containing references and source files. Below are the required sections that should be included to ensure the visualization is as accurate and useful as possible.
What to include in the specifications
- Surface footage and geometry: total footage, ceiling heights, room dimensions, wall/partition thicknesses, opening, window, and door references, floor/ceiling elevations, niches, beams, radiators, and ventilation ducts. A measured plan or precise drawing (DWG/PDF) is ideal.
- Layout and functionality: furniture arrangement, walkways, storage areas, usage scenarios, work surface requirements, number of seats, etc.
- Style and mood: a brief description of the concept (e.g., «modern minimalism, warm natural textures, calm palette»), desired materials, and «don’ts» (what definitely should not be used).
- References: 10-30 images with notes on what you like (wall color, lighting type, kitchen shape, wood texture). We recommend dividing them into folders: general atmosphere, furniture, lighting, materials, and decor. If references contradict each other, indicate their priority.
- Materials and items: list of finishes (floor/walls/ceiling), brands/collections (if available), links to furniture and lighting, dimensions, and key specifications. If there are no specifics, specify the level of freedom for the visualizer: «select analogs within the style.»
- Lighting and time of day: day/evening scenario, light type (warm/neutral), accents, need for included sources, presence of backlights.
- Shot composition: list of rooms, number of angles for each, key points (what must be visible), restrictions (what not to show), format (horizontal/vertical), intended purpose (portfolio, approval, marketing).
- Technical requirements: resolution (e.g., 3000–5000 px on the long side), file format (JPG/PNG), color profile if necessary, deadlines, number of revision rounds, and what is considered an edit (replacing materials, reworking the model, changing the layout).
- Check for consistency: the layout, furniture, and references must «Converge» on logic and dimensions.
- Record the levels of approval: first geometry and layout, then materials/lighting, then decor and the final render.
- Determine the criteria for completion: what is considered final (number of shots, quality, composition of objects, absence of «empty» areas).
Result: a strong specification includes precise dimensions, a clear style, accurate references with comments, and a pre-approved composition of shots. Such preparation reduces deadlines, reduces the number of revisions, and makes 3D interior visualization a true decision-making tool rather than a source of uncertainty.